
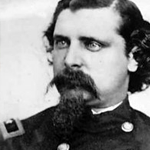
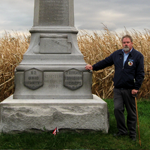
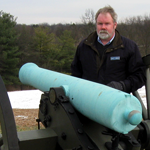
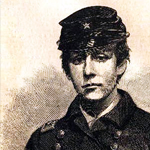
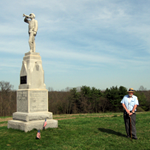
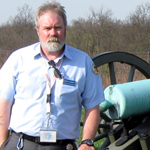
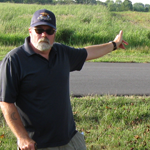
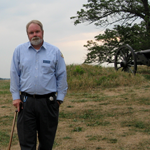
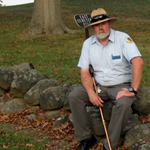
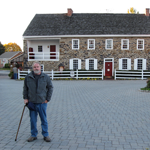
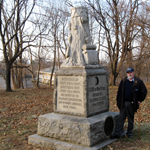
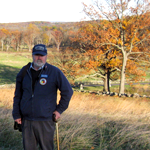
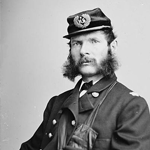
Gettysburg Licensed Battlefield Guide Stuart Dempsey is our host for a series on the Eleventh Army Corps during the Battle of Gettysburg. Stuart had two relatives in the Eleventh Corps (73rd Ohio Infantry Regiment) and both were killed/mortally wounded at Gettysburg. They are both buried in the National Cemetery. Stuart has been a Licensed Battlefield Guide since 2004.
To contact Stuart Dempsey, click here to reveal his email address.
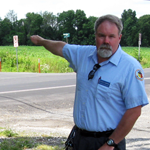
11th Corps at Gettysburg Part 1
In today’s post, Stuart introduces himself and shows us some of the routes that the 11th Corps took as they approached the Gettysburg Battlefield.
See the full Post Here
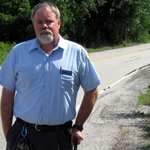
11th Corps at Gettysburg Part 2
In today’s post he brings Major-General Howard to the Peach Orchard, and shows the route that two of Howard’s divisions took to get to Gettysburg.
See the full Post Here

11th Corps at Gettysburg Part 3
In today’s post he describes the reasons Howard found Cemetery Hill and thought it was an important position. Howard also wanted to get a closer look at the fighting to the west and north of town. He moved into the town for that look.
See the full Post Here
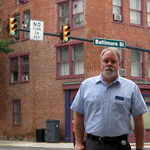
11th Corps at Gettysburg Part 4
In today’s post, Gettysburg Licensed Battlefield Guide Stuart Dempsey shows us the view from the top of the Fahnestock Building on an overcast day.
See the full Post Here
11th Corps at Gettysburg Part 5
In today’s post, Licensed Battlefield Guide Stuart Dempsey shows that after his visit to the Fahnestock Building, Major-General Howard returned to Cemetery Hill and issued orders for other units to come to Gettysburg. Stuart also introduces us to the positioning of the Eleventh Corps on the fields north of town.
See the full Post Here
11th Corps at Gettysburg Part 6
In today’s post, Stuart gave some background about the men who made up the Eleventh Corps, and their desire to perform well after the Battle of Chancellorsville in May, 1863.
See the full Post Here

11th Corps at Gettysburg Part 7
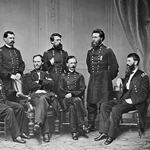
In today’s post, Gettysburg Licensed Battlefield Guide Stuart Dempsey describes command changes in the corps on July 1, 1863, and when the first units of the Eleventh Corps arrived on the field.
See the full Post Here

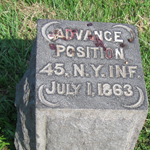
11th Corps at Gettysburg Part 8
In today’s post, Stuart Dempsey shows us the advance of four companies of the 45th New York Infantry Regiment towards the McClean Barn on July 1, 1863.
See the full Post Here
11th Corps at Gettysburg Part 9
In today’s post, Licensed Battlefield Guide Stuart Dempsey showed us the fighting around the McLean Farm and the position of monuments of the First Brigade of the Third Division of the Eleventh Corps.
See the full Post Here
11th Corps at Gettysburg Part 10
In today’s post, Gettysburg Licensed Battlefield Guide Stuart Dempsey describes the arrival of artillery on the Eleventh Corps line and the initial position of the Second Brigade of the Third Division of the Eleventh Corps.
See the full Post Here
11th Corps at Gettysburg Part 11
In today’s post, Stuart Dempsey gives brief sketches of some Third Division units of the Eleventh Corps including the 74th Pennsylvania, the 61st Ohio, and Wheeler’s 13th New York Battery.
See the full Post Here
11th Corps at Gettysburg Part 12
In today’s post, Stuart presents stories of the 82nd Illinois Infantry Regiment, the 157th New York Infantry Regiment, and the 119th New York Infantry Regiment.
See the full Post Here
11th Corps at Gettysburg Part 13
In today’s post, Gettysburg Licensed Battlefield Guide Stuart Dempsey shows us the monuments to the 82nd Ohio Infantry Regiment, the 75th Pennsylvania Infantry Regiment, the 26th Wisconsin Infantry Regiment, and the 58th New York Infantry Regiment.
See the full Post Here
11th Corps at Gettysburg Part 14
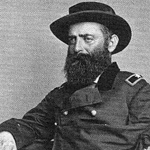
In today’s post, Stuart asks that donations be sent to save part of the Chancellorsville Battlefield, and he describes Francis Barlow, and Barlow’s Division.
See the full Post Here

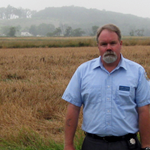
11th Corps at Gettysburg Part 15
In today’s post, Stuart shows us the location of the Adams County Alms House and provides some background on Von Gilsa’s Brigade and Ames’ Brigade.
See the full Post Here
11th Corps at Gettysburg Part 16
In today’s post, Stuart speculates on why Brigadier General Barlow left his assigned position near the Alms House and moved to Blocher’s Knoll/Barlow’s Knoll.
See the full Post Here
11th Corps at Gettysburg Part 17
In today’s post, Gettysburg Licensed Battlefield Guide Stuart Dempsey shows us the topography of Barlow’s Knoll and how the placement of monuments on the knoll doesn’t exactly match the locations where troops were positioned.
See the full Post Here
11th Corps at Gettysburg Part 18
In today’s Eleventh Corps post, Gettysburg Licensed Battlefield Guide Stuart Dempsey brings all of Adelbert Ames’ Brigade to the Barlow’s Knoll area, where they would be attacked by Georgians on July 1, 1863.
See the full Post Here
11th Corps at Gettysburg Part 19
In today’s Eleventh Corps post, Gettysburg Licensed Battlefield Guide Stuart Dempsey shows the position of the 54th New York Infantry along Rock Creek, and “behind” them, the position of the 153rd Pennsylvania.
See the full Post Here

11th Corps at Gettysburg Part 20
In today’s Eleventh Corps post, Gettysburg Licensed Battlefield Guide Stuart Dempsey shows the position of the 25th and of the 107th Ohio Infantry Regiment, and discusses the commander of the 107th Ohio, Colonel Seraphim Meyer.
See the full Post Here
11th Corps at Gettysburg Part 21
In today’s Eleventh Corps post, Gettysburg Licensed Battlefield Guide Stuart Dempsey describes the action of the 75th Ohio and the 17th Connecticut, and the collapse of Barlow’s line on July 1, 1863.
See the full Post Here
11th Corps at Gettysburg Part 22
In today’s Eleventh Corps post, Gettysburg Licensed Battlefield Guide Stuart Dempsey describes the collapse of Krzyzanowski’s Brigade on the afternoon of July 1, 1863.
See the full Post Here

11th Corps at Gettysburg Part 23
In today’s Eleventh Corps post, Gettysburg Licensed Battlefield Guide Stuart Dempsey describes the fighting of the 157th New York Infantry Regiment on the afternoon of July 1, 1863.
See the full Post Here
11th Corps at Gettysburg Part 24
In today’s Eleventh Corps post, Gettysburg Licensed Battlefield Guide Stuart Dempsey describes the fighting of Heckman’s Ohio Battery, and the position of Colonel George Von Amsberg’s Brigade on the afternoon of July 1, 1863.
See the full Post Here
11th Corps at Gettysburg Part 25
In today’s Eleventh Corps post, Gettysburg Licensed Battlefield Guide Stuart Dempsey describes the fighting at Coster Avenue, and the retreat of the 45th New York on the afternoon of July 1, 1863.
See the full Post Here
11th Corps at Gettysburg Part 26
In today’s Eleventh Corps post, Gettysburg Licensed Battlefield Guide Stuart Dempsey describes the corps’ retreat through the center of town and the south of town toward Cemetery Hill on July 1, 1863.
See the full Post Here
11th Corps at Gettysburg Part 27
In today’s Eleventh Corps post, Gettysburg Licensed Battlefield Guide Stuart Dempsey describes the corps’ retreat to Cemetery Hill on July 1, 1863 and concludes his presentation of the first day’s fight.
See the full Post Here
11th Corps at Gettysburg Part 28
In today’s Eleventh Corps post, Gettysburg Licensed Battlefield Guide Stuart Dempsey introduces us to Orland Smith’s Brigade of Adolph von Steinwehr’s Division.
See the full Post Here
11th Corps at Gettysburg Part 29
In today’s Eleventh Corps post, Gettysburg Licensed Battlefield Guide Stuart Dempsey provides an overview of Cemetery Hill, and where the first United States retreating soldiers took position here on July 1, 1863.
See the full Post Here
11th Corps at Gettysburg Part 30
In today’s Eleventh Corps post, Gettysburg Licensed Battlefield Guide Stuart Dempsey explains the positions of the Eleventh Corps units on and around Cemetery Hill.
See the full Post Here
11th Corps at Gettysburg Part 31
In today’s Eleventh Corps post, Gettysburg Licensed Battlefield Guide Stuart Dempsey explains the position of some Eleventh Corps artillery, and the arrival of Winfield Scott Hancock.
See the full Post Here
11th Corps at Gettysburg Part 32
In today’s Eleventh Corps post, Gettysburg Licensed Battlefield Guide Stuart Dempsey explains the different positions occupied by Orland Smith’s Brigade, and shows where the regiments of Smith’s Brigade were posted early on the morning of July 2, 1863.
See the full Post Here
11th Corps at Gettysburg Part 33
In today’s Eleventh Corps post, Gettysburg Licensed Battlefield Guide Stuart Dempsey shows positions occupied by soldiers from Orland Smith’s Brigade and some Confederates in the area of South Washington Street.
See the full Post Here

11th Corps at Gettysburg Part 34
In today’s Eleventh Corps post, Gettysburg Licensed Battlefield Guide Stuart Dempsey shows positions occupied by soldiers from Orland Smith’s Brigade in and around an area Stuart has designated as “Smith’s Ridge.”
See the full Post Here
11th Corps at Gettysburg Part 35
In today’s Eleventh Corps post, Gettysburg Licensed Battlefield Guide Stuart Dempsey continues to show positions occupied by soldiers from Orland Smith’s Brigade in and around an area Stuart has designated as “Smith’s Ridge.”
See the full Post Here
11th Corps at Gettysburg Part 36
In today’s Eleventh Corps post, Gettysburg Licensed Battlefield Guide Stuart Dempsey continues to show positions occupied by soldiers from Orland Smith’s Brigade in and around an area Stuart has designated as “Smith’s Ridge.”
See the full Post Here
11th Corps at Gettysburg Part 37
In today’s Eleventh Corps post, Gettysburg Licensed Battlefield Guide Stuart Dempsey discusses some of the Eleventh Corps artillery under Thomas W. Osborne especially Wiedrich’s New York Battery.
See the full Post Here
11th Corps at Gettysburg Part 38
In today’s Eleventh Corps post, Gettysburg Licensed Battlefield Guide Stuart Dempsey discusses the actions of some Eleventh Corps artillery units commanded by Hubert Dilger and Eugene Bancroft after the batteries reached Cemetery Hill.
See the full Post Here
11th Corps at Gettysburg Part 39
In today’s Eleventh Corps post, Gettysburg Licensed Battlefield Guide Stuart Dempsey discusses the actions of some Eleventh Corps artillery units commanded by William Wheeler and Lewis Heckman after the batteries reached Cemetery Hill.
See the full Post Here
11th Corps at Gettysburg Part 40
In today’s Eleventh Corps post, Gettysburg Licensed Battlefield Guide Stuart Dempsey discusses the position of Ames’ Division on East Cemetery Hill and the positions of the First Corps Artillery.
See the full Post Here
11th Corps at Gettysburg Part 41
In today’s Eleventh Corps post, Gettysburg Licensed Battlefield Guide Stuart Dempsey presents the role of four Eleventh Corps infantry regiments that were moved to Culp’s Hill on July 2, 1863.
See the full Post Here
11th Corps at Gettysburg Part 42
In today’s Eleventh Corps post, Gettysburg Licensed Battlefield Guide Stuart Dempsey presents the role of Colonel Andrew Harris’ Brigade in the afternoon and evening of July 2, 1863.
See the full Post Here
11th Corps at Gettysburg Part 43
In today’s Eleventh Corps post, Gettysburg Licensed Battlefield Guide Stuart Dempsey presents the role of Colonel Leopold von Gilsa’s Brigade in the afternoon and evening of July 2, 1863.
See the full Post Here
11th Corps at Gettysburg Part 44
In today’s Eleventh Corps post, Gettysburg Licensed Battlefield Guide Stuart Dempsey describes the attack of Avery’s North Carolinians on Rickett’s Battery on the evening of July 2, 1863.
See the full Post Here
11th Corps at Gettysburg Part 45
In today’s Eleventh Corps post, Gettysburg Licensed Battlefield Guide Stuart Dempsey describes the attack and repulse of Hays’ Louisiana Tigers on Wiedrich’s Battery on the evening of July 2, 1863.
See the full Post Here
11th Corps at Gettysburg Part 46
In today’s Eleventh Corps post, Gettysburg Licensed Battlefield Guide Stuart Dempsey describes the skirmish line of the Eleventh Corps near the base of the north slope of East Cemetery Hill.
See the full Post Here
11th Corps at Gettysburg Part 47
In today’s post, Gettysburg Licensed Battlefield Guide Stuart Dempsey presents the casualties and describes the reputation of the unit, and concludes his series on the Eleventh Corps at Gettysburg.
See the full Post Here